Which Needlepoint Stitch Should I Use for a Background?
Choosing a needlepoint background stitch is the step most stitch guides skip. Most of them answer how to work a stitch. Far fewer answer the question that actually holds people up: which one to choose. This page is the decision, not the technique.
Background is the largest area on most canvases, the part that takes the longest, and the part that decides whether the finished piece reads as flat or alive. It is worth a few minutes of thinking before the first stitch goes in.
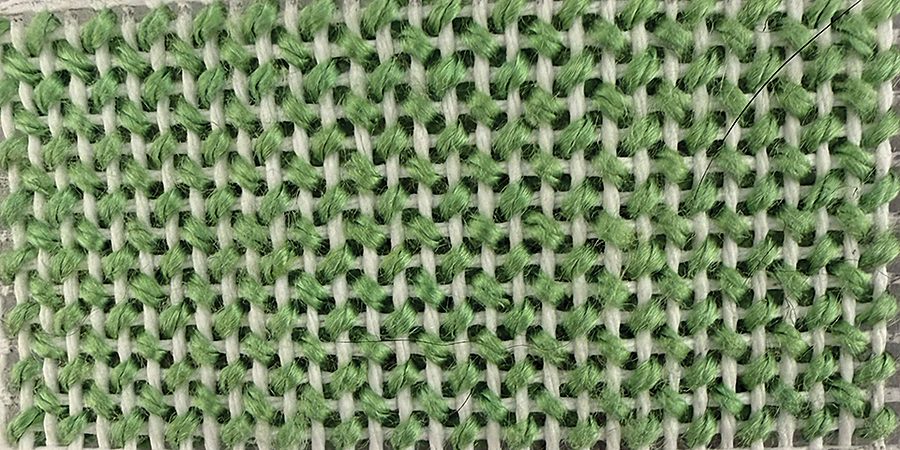
T-Stitch — small-scale, and forgiving in narrow or tightly curved areas.
On this page
- Start with the size of the area, not the look of the stitch
- Then check your mesh count
- Decide how much your needlepoint background stitch should say
- Expect to see some canvas — and know when that matters
- Think about the edges before you start
- Let the thread be the last decision, not the first
- A working needlepoint background stitch shortlist
- Where the needlepoint background stitch charts and videos are
- More on choosing needlepoint stitches
Start with the size of the area, not the look of the stitch
This is the mistake almost everyone makes when picking a needlepoint background stitch: choosing it from a photograph and then discovering it does not fit.
Measure the narrowest part of the background, not the widest. If that measurement will not hold two or three complete repeats of the stitch, the stitch is too large for the space — you will spend the whole area compensating and the pattern will never appear.
| If your background is… | Reach for… |
|---|---|
| Narrow, broken up, or tightly curved | Small stitches — T-Stitch, Mosaic, Skipped Tent |
| A normal open area around a motif | Medium stitches — Nobuko, the Hungarian family |
| Large and uninterrupted | Large stitches — Open Diamonds, Bargello Swing, Wide Diamond |
A note on the groupings. Small, medium and large are the groupings used in Background Stitches Volume 1, and they are relative to the 45 stitches in that book rather than to needlepoint as a whole — the Hungarian family sits in the middle third here, for instance, though many stitchers would call Hungarian a compact stitch.
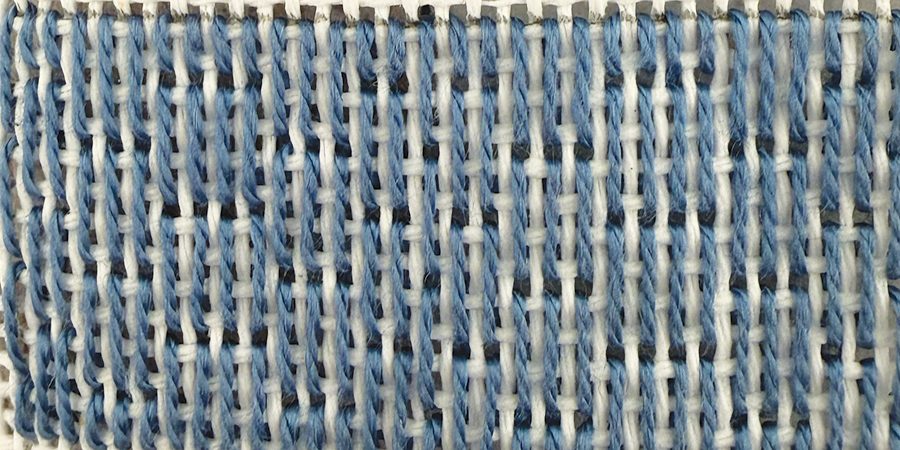
Bargello Swing — a large stitch, at home in a generous uninterrupted area.
Then check your mesh count
Canvases generally run from 10 to 18 mesh — the number of holes per inch, so a lower number means larger holes.
The same stitch is roughly half the physical size on 18 mesh that it is on 10. A large needlepoint background stitch on fine canvas can read as medium; a small stitch on coarse canvas can look surprisingly bold. “Too big” is never a property of the stitch on its own — only of the stitch on your canvas.
Decide how much your needlepoint background stitch should say
A background can recede or it can participate. Both are legitimate; the mistake is not choosing.
- Recede — a small, dense, quiet stitch in a colour close to the canvas. The motif does all the talking.
- Participate — a larger, more geometric stitch that becomes part of the design. Powerful behind a simple motif, overwhelming behind a detailed one.
Expect to see some canvas — and know when that matters
Most needlepoint background stitches are open stitches by design: they let the ground show through, and that is part of the texture.
On a bare white canvas, bright thread makes that showing-through look stark. On a painted canvas the effect is completely different — your thread sits close to the shade of the canvas beneath it, so what peeks through reads as depth rather than as a gap. This is why a stitch that looks harsh on a blank sampler can look beautiful on a painted piece.
Think about the edges before you start
Where a full stitch will not fit against an edge or a painted shape, you work a partial one — a compensation stitch. Every needlepoint background stitch can be compensated, but they are not equally forgiving.
Simple stitches shorten cleanly and the eye does not catch it. Complex stitches with several elements per repeat lose their identity when cut in half, and a background boundary that is mostly curved will show it on every row. If your motif has a lot of curved edge, that argues for a smaller, simpler stitch regardless of how much open space you have.
Let the thread be the last decision, not the first
A matte wool fills the canvas and mutes whatever pattern you chose. A silk or a stranded cotton laid flat catches the light and sharpens it. The same stitch in the same colour can be quiet or brilliant depending only on this.
If you are undecided, stitch a small square of the pattern on a scrap of the same mesh in the thread you plan to use. Ten minutes there saves an evening of reverse stitching.
A working needlepoint background stitch shortlist
If you want somewhere to start rather than a framework:
- Safe and quiet, any area — Mosaic
- Sky, water, fur — Nobuko, or Alternating Nobuko where the background wraps around the motif
- Something with more character, plenty of room — Open Diamonds or Wide Diamond
- Tight, awkward, heavily interrupted — T-Stitch or Skipped Tent
Where the needlepoint background stitch charts and videos are
Stitch School: Background Stitches Volume 1 charts 45 needlepoint background stitches, grouped small, medium and large for exactly the decision above. Every stitch has a numbered chart, a photograph of the finished stitch, and a video of it being worked start to finish.
The book is $24 — the complete PDF to download and keep, plus a full year of access to the video lessons. See what is in Volume 1.
More on choosing needlepoint stitches
- The Nobuko stitch — the medium-scale workhorse for skies, water and fur
- Mosaic vs Scotch: which should you use?
- All needlepoint stitches in this reference
Stitch School is published by AMK Publications, who also produce Needlepoint Now magazine.